
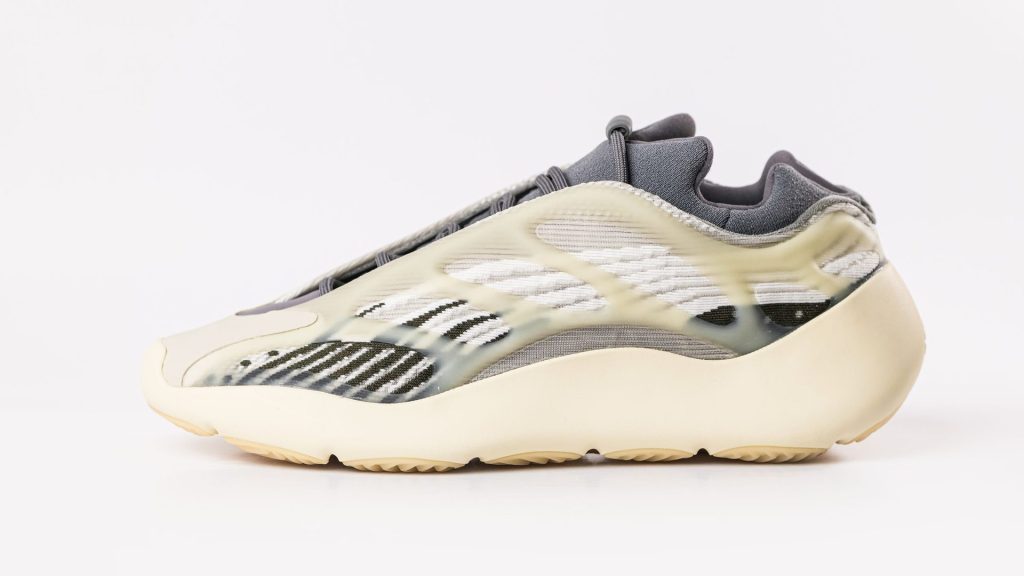
White background product photography is the default look of online retail for good reason. A clean white background puts all the attention on the product, makes a catalog easy to scan and meets the main image rules of marketplaces such as Amazon. It also looks deceptively simple. In practice, a “white” background often comes out grey, blue or patchy, products lose their edges, and shadows land in the wrong place. This guide walks through the equipment, lighting setups, camera settings and editing steps that produce clean, consistent white background photos, whether you are shooting one product or a whole catalog.
Why White Backgrounds Work
Focus on the Product
A white background removes distractions. Nothing competes with the item for attention, so shoppers see its shape, colour and details immediately.
Easy Comparison
When every product in a grid sits on the same white background, shoppers can compare items quickly. Inconsistent backgrounds make a catalog look like a collection of different shops.
Marketplace Compliance
Some marketplaces require a white background for the main image. Amazon, for example, requires a pure white main image background of RGB 255, 255, 255. Shooting and editing for white from the start means one set of photos can serve several channels. Our Amazon product photo size guide covers the other main image rules.
Flexibility Later
A clean product on white is easy to reuse. It can be placed on a coloured canvas, added to a lifestyle composite or trimmed into a cutout for ads, without fighting a busy original background.
The Equipment You Need
You do not need a professional studio. A small, well-planned setup produces excellent results.
A White Sweep
A sweep is a sheet of white material that runs along the table and curves up behind the product, with no visible corner between surface and wall. Poster board, seamless paper or a matte white plastic sheet all work. Avoid glossy surfaces unless you want reflections.
A Light Tent or Shooting Box
For small products, a light tent or shooting box combines a white backdrop with diffusion on the sides. It is an easy, compact way to get soft light and a clean background.
Light Sources
Daylight from a large window is free and soft, but it changes through the day. Continuous LED panels or softboxes give the same light every time, which matters when you shoot many products across several sessions. Whatever you use, keep all lights at the same colour temperature.
Diffusers and Reflectors
A diffuser softens light and reduces harsh shadows. A white reflector, such as a piece of foam board, bounces light back into shadows on the side of the product away from the main light.
A Tripod
A tripod keeps framing, angle and distance identical from shot to shot. That consistency makes editing faster and helps every product in your catalog look the same size.
Lighting Setups That Work
One Window Setup
Place the table beside a large window with indirect daylight. Put the sweep on the table, the product in the middle and a white reflector on the side away from the window. This is the simplest setup and works well for many small products.
Two Light Setup
Place one soft light at about 45 degrees to the front left of the product and another at 45 degrees to the front right. This creates even light across the product with soft, balanced shadows. It is a dependable setup for boxes, bottles and most everyday items.
Lighting the Background Separately
To get a truly white background in camera, light the background a little more brightly than the product. One way is to add a light aimed at the sweep behind the product. This pushes the background towards pure white while keeping the product correctly exposed.
Overhead Light for Flat Lays
For clothing, stationery and flat products, light from above with a large soft source. Shoot from directly overhead with the camera parallel to the surface.
Camera Settings for White Backgrounds
Shoot in Manual Where You Can
Automatic modes see a lot of white and often underexpose, turning the background grey. Manual exposure, or exposure compensation set slightly brighter, keeps the background bright.
Set White Balance
Set white balance to match your lights, or use a custom white balance taken from the white backdrop. This prevents a blue or yellow tint that is difficult to fix consistently across many photos.
Use a Low ISO
A low ISO keeps noise out of shadows and edges. With a tripod, you can use a slower shutter speed instead of raising ISO.
Choose an Aperture for Depth
A mid-range aperture keeps the whole product in focus from front to back. Very wide apertures blur parts of the product, which suits lifestyle images more than catalog shots.
Lock Focus and Framing
Once you have a good setup, keep the camera position and zoom the same for similar products. This keeps scale consistent across your catalog.
Shooting With a Phone
Phones can produce excellent product photos if you control the light. Use a tripod, tap to focus on the product, lower the exposure slider slightly if highlights blow out, and avoid digital zoom. Our guide to fixing smartphone product photo problems covers the common pitfalls.
Getting Pure White in Editing
Even with good lighting, most backgrounds come out light grey rather than pure white. There are two main ways to finish the job.
Brightening the Background
For simple products with clear edges, you can brighten the background with levels or curves until it reaches pure white. The risk is that bright parts of the product, such as white packaging or reflective edges, also wash out.
Removing the Background
The cleaner approach is to cut the product out and place it on a new pure white canvas. This gives a perfectly even background every time and keeps the product’s own exposure untouched. It is also how most sellers handle large catalogs, because the result is identical across every image. If you are new to this, read our guide on removing backgrounds without Photoshop.
Check the Numbers, Not Just Your Eyes
A background can look white on your screen and still measure slightly off-white. Use the colour picker in your editing tool to confirm it reads 255, 255, 255 where pure white is required.
Shadows: Keep, Soften or Remove
No Shadow
A product with no shadow at all can look like it is floating. That suits some catalogs, especially when products are shown as clean cutouts in a grid.
Soft Natural Shadow
A soft shadow under the product grounds it and adds realism. Many brands prefer this look. If you keep shadows, make sure they look similar across your catalog, which is easier with consistent lighting.
Reflection
A subtle reflection under the product, often used for electronics and cosmetics, gives a premium feel. It takes more effort to keep consistent across many images.
Whichever you choose, choose one approach and apply it everywhere. Mixing floating products with shadowed ones looks careless in a grid.
Tricky Products on White
White Products
White items on a white background can disappear. Use lighting that creates gentle shading along the edges, or consider a very light grey canvas for listings where pure white is not required.
Reflective and Glass Products
Glass, chrome and glossy plastics reflect everything around them. Large, soft light sources and white or black cards around the product control reflections. Background removal can be harder on transparent items, so check edges carefully. Our guide for taming glare and reflections goes deeper.
Fine Edges
Hair, fur, lace and fuzzy textiles have soft edges that are easy to clip during background removal. A tool that handles fine detail well saves a lot of manual masking.
Very Small Items
Jewelry and small accessories need close focus, sharp detail and careful exposure. Our guide to editing tiny products at scale covers the specific challenges.
Consistency Across a Whole Catalog
One great photo on white is satisfying. A catalog of hundreds of products that all look like they were shot on the same day is what makes a store look professional. Consistency comes from the same lighting, the same background, the same scale and the same position in the frame.
Framing and Padding
After background removal, each product should sit in the same position on the canvas, with margins that make products of different shapes look balanced. Setting padding as a percentage of the canvas, rather than a fixed number of pixels, gives better results across tall, wide and square items.
Canvas Size and Ratio
Decide on one canvas size and ratio per channel, for example a 2,000 pixel square for marketplaces, and use it for every product.
Where Pixeroom Fits
Pixeroom was built for this stage. Upload one image or a whole catalog, and Pixeroom removes backgrounds with AI, centers every product and pads it to your exact spec, with offsets by percentage from any edge. You can adjust margins, canvas and background, save the settings as a template, and reuse it for every future batch, so products photographed months apart still match. Export JPG or PNG on any plan, plus WEBP on Pro and Enterprise, and download a single image or the whole set as a ZIP.
The free plan includes three single-image exports and one bulk ZIP export every day, which is a simple way to test your white background template on real products before you process the rest of your catalog.
Planning a Shoot Day for a Large Catalog
When you have dozens or hundreds of products to photograph, planning the day matters as much as the lighting. A little organisation keeps the setup stable and the results consistent.
Group Products by Size and Type
Shoot similar products together. Moving from small jars to large boxes and back again means constantly adjusting the camera, the lights and the framing. Grouping lets you set up once for each group and shoot through it quickly.
Mark Your Positions
Use small pieces of tape to mark where the product sits, where the tripod stands and where each light goes. If something gets knocked, you can restore the setup exactly instead of guessing.
Take a Reference Shot
At the start of each session, photograph a plain white card or a grey card in the product position. It gives you a reference for exposure and white balance when you edit, and it shows quickly if the light has changed between sessions.
Name Files as You Go
Before photographing each product, take a quick shot of its SKU label or a card with the product code. When you sort files later, that shot marks where each product’s photos begin, which makes renaming and matching much easier.
Check Shots Before You Pack Up
Review a sample on a large screen before you take the setup down. Soft focus, a stray reflection or a dusty surface is easy to fix while the lights are still in place and much harder to fix later.
Keep the Originals
Store untouched originals in a separate folder or backup. If a marketplace changes its requirements or you rebrand, you can produce new versions without reshooting, as described in our guide to re-editing a catalog after a rebrand.
A Step-by-Step Workflow
- Set up a white sweep with soft, even light from two sides or a large window.
- Set manual exposure and white balance, and lock the camera on a tripod.
- Shoot every product from the same distance and angle.
- Review shots on a large screen and reshoot anything soft or badly lit.
- Remove backgrounds and place each product on a pure white canvas.
- Apply the same centering and percentage padding to every image.
- Export at the size and format each channel needs.
- Spot-check background values and edges at full size.
Common Mistakes
Grey Backgrounds
Underexposure turns white into grey. Light the background more brightly, adjust exposure or replace the background in editing.
Colour Casts
Mixed light sources, such as daylight plus a warm bulb, give uneven colour. Use one type of light and set white balance.
Uneven Scale
Products shot from different distances look different sizes in a grid. Use a tripod and consistent padding.
Harsh Shadows
Small, direct light sources cast hard shadows. Diffuse the light or move it closer to make it softer.
Clipped Edges
Over-brightening the background can erase the edges of light products. Background removal avoids this.
Frequently Asked Questions
What do I need for white background product photography at home?
A white sweep or light tent, soft light from a window or two lamps, a reflector and a tripod are enough for most small products.
Why does my white background look grey?
The camera is usually underexposing because it sees so much white. Increase exposure, add light to the background, or replace the background with pure white in editing.
Do I need a white background for every marketplace?
No. Amazon requires pure white for main images, but many other channels allow other clean backgrounds. White is still a safe, flexible choice for main product photos.
Should I keep shadows on a white background?
It depends on your style. Soft shadows add realism, while no shadow gives a clean cutout look. Choose one approach and use it consistently.
What is the best lighting setup for white background product photography?
Two soft lights at about 45 degrees on either side of the product, with the background lit slightly brighter, is a reliable starting point.
Can I get a white background without a studio?
Yes. Shoot on any plain, light surface with good light, then remove the background and place the product on a pure white canvas in editing.
The Takeaway
Great white background product photography comes from three things working together: soft, even lighting, a consistent camera setup and an editing step that makes every background pure white and every product sit in the same place. Get the setup right once, save your editing settings as a template and every future batch will match. Open Pixeroom Studio to build your white background template, or compare the plans for larger catalogs.